The only imposter who come in handy : “Octahedral Imposters”
If you’re familiar with working in game engines, you must be familiar with the dropping of the frame rate when adding high polygonal models. The reason for this when your first person camera is processing a certain frame, it will render all the polygons in that specific frame ( according to the LODs or Level of Distance) of course.
How can I magically fix this without changing the quality of my level you ask? You’re in luck.
Octahedral imposter tool comes handy in this situation. This amazing tool enables you to improve your FPS by a great deal. Less talk, let me demonstrate.
First I will tell the step by step guide on using Octahedral imposters.
The idea behind impostors is to capture the object from a variety of view angles and store each view to a texture. An example of cameras arranged around an upper hemisphere:
You can see how each ‘ring’ of the sphere has the same number of verts. So the row near the top of the sphere has verts more densely packed than the equator. This is the layout the old impostor baker used. It wastes tons of resolution around the poles by capturing views that are next together. And yes, the very top Z frame also gets repeated instead of just being a single view. At the time the only reason I used the above layout was because it was cheap to compute in a shader, whereas the more ‘fancy’ methods with equal spacing that people were writing papers about required expensive trig and texture arrays because the grids did not map to 2D space uniformly (For example, BN11 in references).
For this version, I am using Octahedra and Hemi Octahedra to handle the mapping. For those not familiar with octahedra, they are a convenient way to convert between 2D and 3D space, or vice versa. They have been used in graphics for a while to compress things like V3 normals to be V2 since the full direction is preserved (no Z sign loss as with derivenormalZ). UE4 makes use of them in this way internally a few times. Octahedra have very little distortion. Slightly more than a 6 sided cubemap but much much simpler to compute.
To better understand how Octahedrons come into play, I made this animated gif. It shows the result of converting between 2D grid points and 3D points using Hemi-Octahedron (left) and full Octahedron(right).
You may notice that the full octahedron is more evenly spaced. While this is true, the Hemi-Octahedron still gains significant resolution for cases where you never need to see below the horizon. It is also kind of convenient that it gives a bit of over-sampling to the horizon, which is where trees are seen from in most games. Most trees should use the Hemi-Octahedron layout for that reason. Both of these are significantly better than the ‘old style’ method I referenced at the start, notice there are no verts really close together. Note: I have flipped the edge direction around the poles above to make them symmetrical. The current shader is not actually doing that correction because it costs a few more instructions and added complexity. I did have it working at some point though and its a potential way to improve quality and ensure symmetrical flow.
To capture impostors, you specify how many XY frames you want. That determines how dense the ‘grid mesh’ is. Each vertex on the grid will become a rendered frame. Note that the grid itself is entirely virtual within the vertex shader, it is not actually rendered as a mesh at any point.
If we show the virtual grid over the captured Impostor texture atlas, we can see that the vertices of the grid align with frame centers in the atlas.
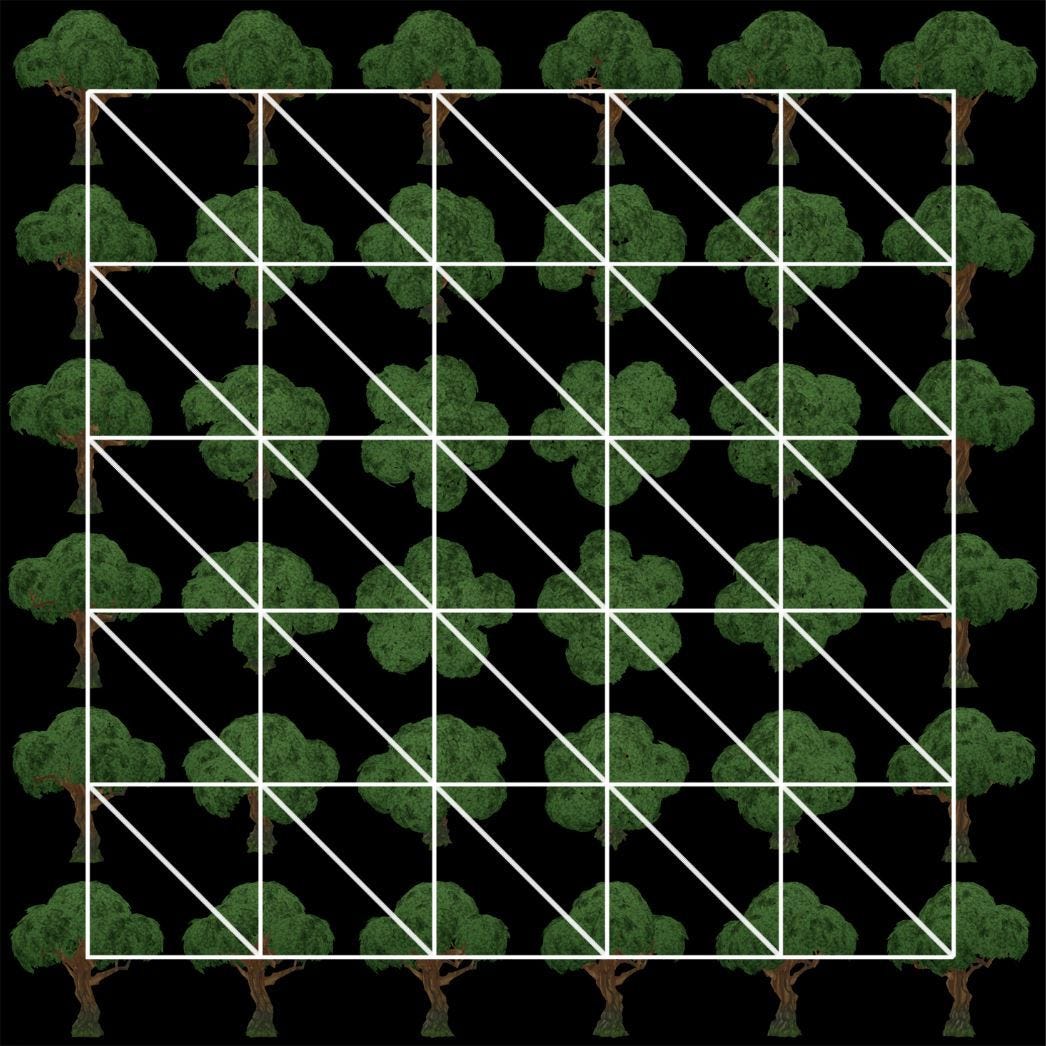
HOW TO CONVERT THE MESHES TO IMPOSTERS
STEP 1 : Download the plugin from https://github.com/LucianoJacomeli/ImpostorBaker as zip
STEP 2 : Extract and place the imposter-baker folder inside your C:/Program Files/Epic Games/UE_4.25/Engine/Plugins
STEP 3 : Go to Unreal engine -> Settings -> Plugins and click on Built-In

STEP 4: Search for ImpostorBaker on search bar and tick Enabled. The engine will ask to restart the project. Restart.

STEP 5 : Go to the Level view and from right side bottom click on view options and tick Show Engine content and Show Plugin Content.

STEP 6 : From the content view, scroll down to Imposter baker content -> ImposterBaker -> Maps. And open Generate Imposter Map.
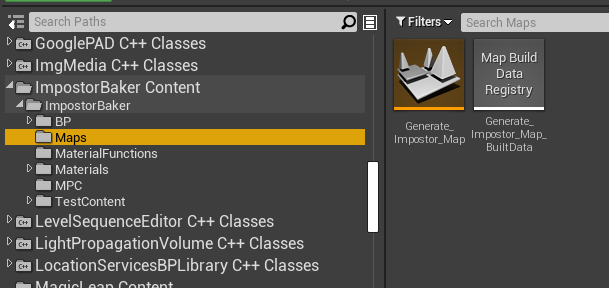
STEP 7 : Drag the mesh you want to convert into imposter to the screen. You’ll see the materials which are contained in the mesh in the details panel.
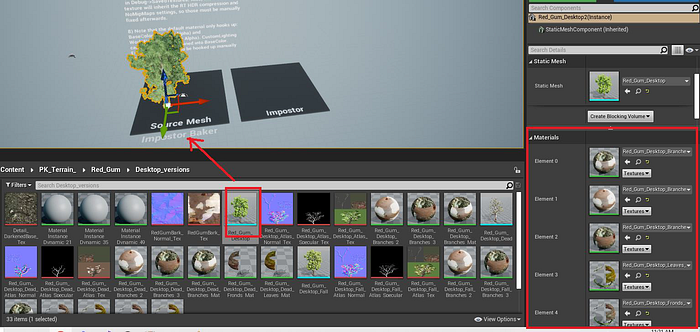
STEP 8 : Double click on the parent material if the mesh contains a parent material. Otherwise for a more natural look you’ll have to change all the materials into the imposter materials. When you double click on the material you will receive the event graph.
STEP 9 : Right click and type MakeMaterialAttributes. Double click on the links which are connected to Materials and connect to respective nodes in Material.

STEP 10 : Right click on the screen and type imposterCaptureSwitch. Connect the received ImposterCaptureSwitch to the MakeMaterialAttributes.
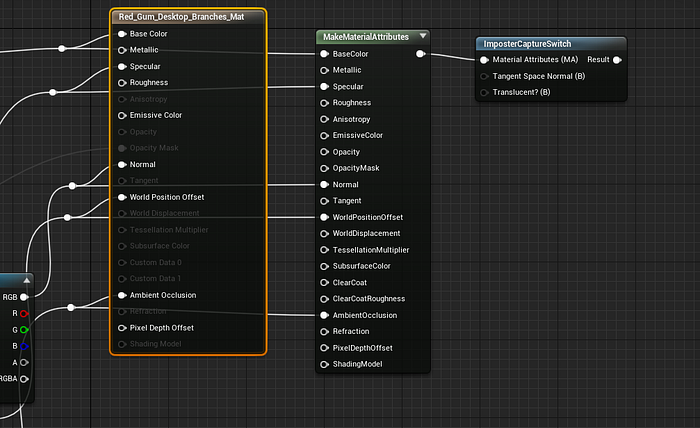
STEP 11 : From details panel in the material section, tick Use Material Attributes. Then the brown color titles material panel will shrink. Connect the material attributes to result of the ImposterCaptureSwitch.

STEP 12 : In the above manner, you’ll have to convert all the materials contained in the mesh to imposter materials.
STEP 13 : Go back to the Generate_Imposter_map and in the World Outliner select BP_Generate_ImposterSprites.

STEP 14 : Scroll down the Details panel and you’ll find the default pane with many options for imposter generation.
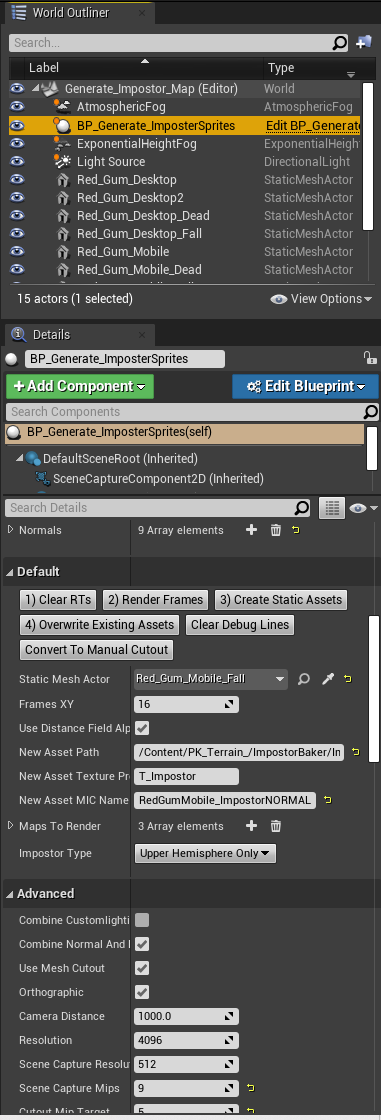
STEP 15 : Select the Static Mesh actor.

STEP 16 : If you have previously generated imposter rendered, click on 1) clear RTs . Then Click on 2) Render Frames button.
STEP 17 : An imposter will be generated on the screen. Then select the location you want to create static assets from New Asset path in the default window. You can also assign a name to the static asset in New Asset MIC Name.
STEP 18: Then click on 3) Create Static Assets button. You will be guided to the materials created.

STEP 19 : Click on the ProceduralMesh. Scroll down and click on CreateStaticMesh in details panel. You will get a window to create meshes. This mesh creation is a middle step which we need for creating our FBX of the imposter mesh. These meshes can be deleted in the future.
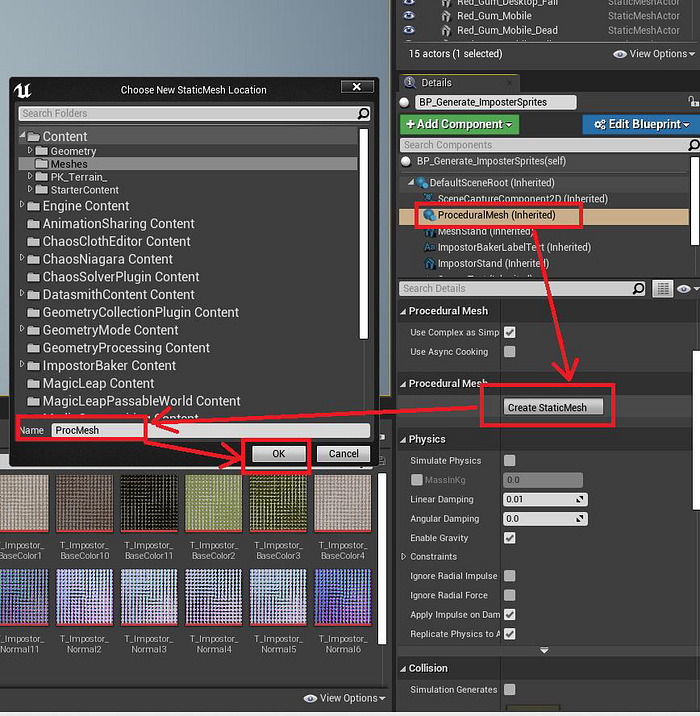
STEP 20 : Go to the mesh created. Right click -> Asset Actions -> Export.
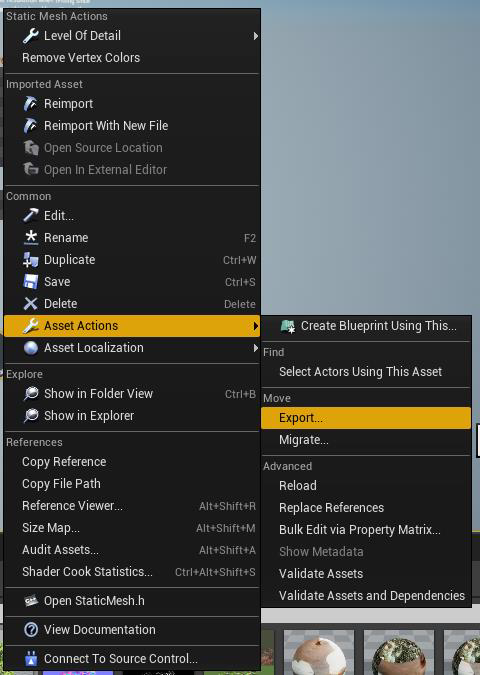
STEP 21 : Save the FBX in a preferred and go to the original mesh and double click and open the mesh window. In the LOD Settings, LOD Import, select import LOD Level 1.
STEP 22 : Go to the materials and select the empty material to the material which you created earlier. This has to the correct imposter material to the specific mesh.
STEP 23 : Save and exit mesh. Save the main project. The you can add the meshes to your project with Imposter mesh at LOD1.
NB: This method uses octahedral imposters and helps in decreasing the number of triangles used when you create bulks of meshes.
BEFORE
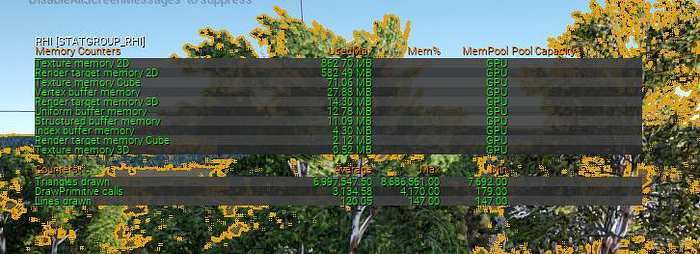
AFTER

Now do you see what I’m talking about?
Alright, now let’s talk efficiency. Imagine you have a huge landscape with a large number of trees. You can assign the imposter model to far LODs and it’ll save your day.
Happy coding.
